






Step-by-Step Guide to Assembling Nursery Gliders

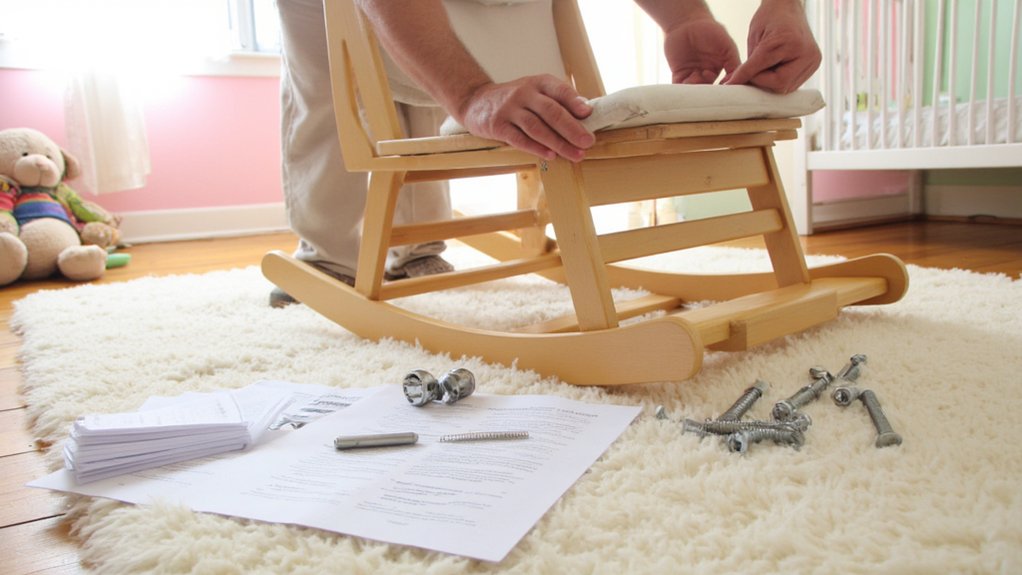
Choose a sturdy slipcovered armchair with proper dimensions and a solid frame. Prepare a clean workspace, organize your tools—screwdriver, screws (1-inch and 1¾-inch), measuring tape—and guarantee safety gear. Remove the chair legs carefully, then position and center the glider base on plywood, securing it with screws evenly to allow smooth rocking. Test motion before tightening completely. Regularly check stability and tighten screws as needed. Keep following for detailed steps on troubleshooting and maintenance.
Table
- Main Points
- Choosing the Right Chair for Your Nursery Glider
- Essential Tools and Materials Needed
- Preparing Your Workspace for Assembly
- Removing the Chair Legs Safely
- Measuring and Cutting the Plywood Base
- Attaching the Plywood Base to the Chair Frame
- Positioning the Glider Base for Optimal Movement
- Securing the Glider Base to the Plywood
- Tightening Screws and Ensuring Stability
- Testing the Rocking Motion of the Glider
- Troubleshooting Common Assembly Issues
- Safety Tips for Nursery Glider Use
- Maintaining and Caring for Your Nursery Glider
- Frequently Asked Questions
- Final Thoughts
Main Points
- Prepare a clean workspace and organize all tools and parts before starting the nursery glider assembly.
- Remove chair legs carefully using the correct tools, wearing gloves and ensuring a stable surface.
- Align the glider base with the chair frame, leaving clearance for smooth rocking and swiveling motion.
- Secure the glider base with 1-inch screws evenly distributed, using a power drill for stable attachment.
- Perform safety checks by tightening all screws and testing the glider’s motion for wobbling or resistance.
Choosing the Right Chair for Your Nursery Glider
How do you select the ideal chair for your nursery glider? Start by evaluating size and dimensions to confirm the glider chair fits your space and allows smooth rocking. Choose a slipcovered armchair from reliable retailers like IKEA, offering styles that suit your nursery theme and are easy to clean. Prioritize a sturdy frame and durable upholstery to endure frequent use while providing comfort during feeding or soothing. Many top gliders feature adjustable armrests and lumbar support to enhance comfort during long nursing sessions. Verify the chair’s height and armrest position for ergonomic access when nursing or comforting your baby, enhancing practicality. Finally, factor in additional costs, including the glider base and hardware, to maintain a budget-friendly total price without compromising quality or aesthetics. This approach guarantees a functional, long-lasting nursery glider tailored to your caregiving needs.
Essential Tools and Materials Needed
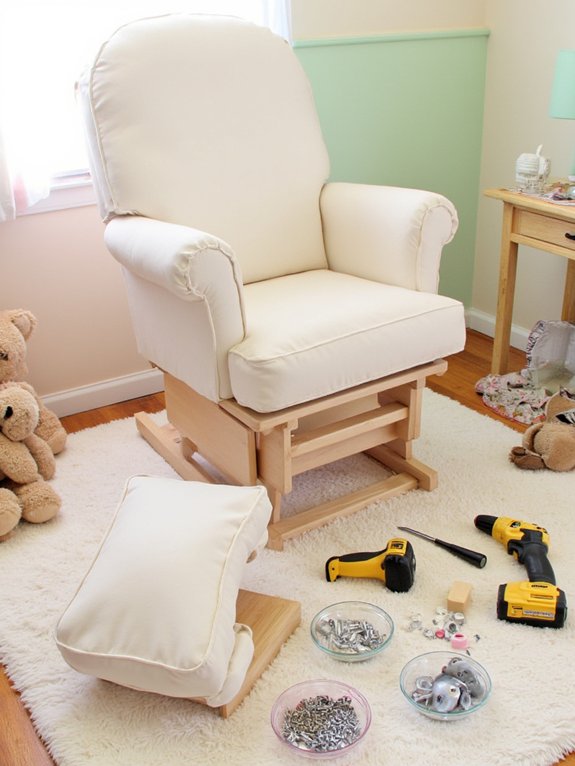
Before you begin assembling your nursery glider, gather all essential tools and materials to streamline the process. Today I’m going to guide you through the necessary components: a slipcovered armchair, a glider base, plywood, and screws. You’ll need 1 3/4 inch screws for attaching plywood to the chair’s wood frame and 1 inch screws for securing the glider base. Approximately 10 screws will suffice. A power drill or screwdriver is indispensable for fastening these additional parts effectively. Also, have a measuring tape handy to guarantee precise alignment of the glider base, optimizing the rocking motion. This step guarantees you’re prepared, minimizing interruptions and maximizing efficiency during assembly. Remember, proper tool and material prep is fundamental to serving others with a safe, functional nursery glider.
Preparing Your Workspace for Assembly
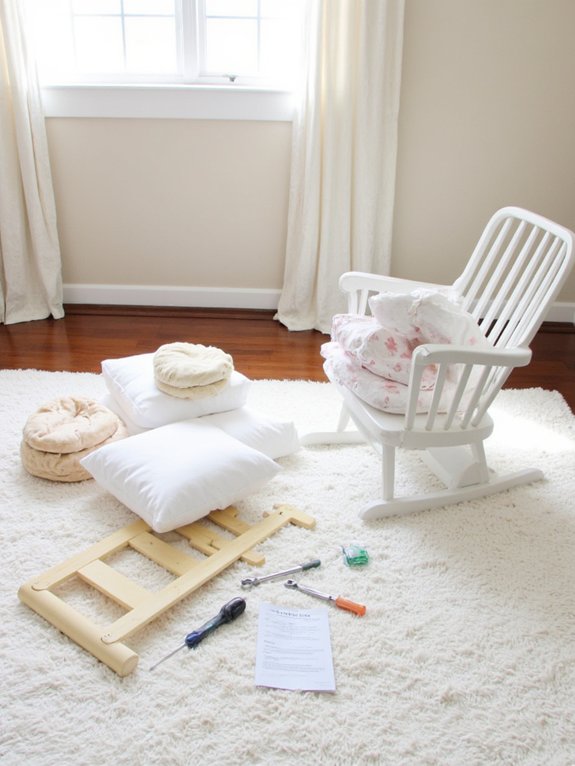
Set up a clear, spacious area to work without distractions and guarantee easy access to all parts.
Organize components and tools systematically to streamline the assembly process.
This preparation helps maintain focus and prevents misplacing small pieces.
Clear and Spacious Area
Choose a clean, spacious area that gives you enough room to move freely and access all tools and components needed for assembling your nursery glider.
Prioritize workspace organization by clearing clutter to minimize assembly distractions and prevent misplaced parts.
Designate a specific spot that allows for space optimization, enabling you to reach materials without unnecessary movement.
Secure small parts safely away from children to maintain safety and order.
Familiarize yourself with the assembly manual beforehand to streamline workflow and reduce interruptions.
By setting up a clear and spacious area, you enhance efficiency and focus, ensuring each step proceeds smoothly and accurately.
This preparation reflects your commitment to serving others through careful, thoughtful assembly.
Organize Parts and Tools
Gathering and organizing all necessary parts and tools is crucial for efficient nursery glider assembly.
Begin by using part identification tips to verify each component against the manual—this prevents delays and omissions.
Implement part organization methods such as grouping screws, plywood, and the glider base separately on a clean, spacious surface.
Follow a tool selection guide to guarantee you have the correct screwdrivers, wrenches, and other implements ready.
Arrange tools within easy reach but out of children’s access to maintain safety and streamline workflow.
Reading through the user guide before starting helps you anticipate assembly steps and required parts.
Maintaining this disciplined workspace preparation supports a smooth, focused assembly process and ultimately serves the caregivers relying on the nursery glider’s comfort and reliability.
Removing the Chair Legs Safely
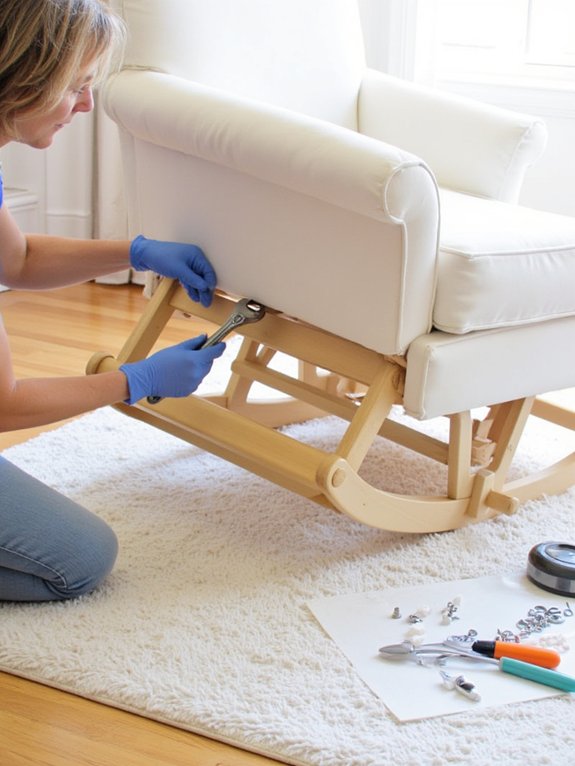
Flip the glider upside down on a soft surface to protect its finish and stabilize it.
Use the correct screwdriver or wrench to carefully remove the legs, keeping all fasteners organized.
Always wear gloves and proceed slowly to avoid injury or damage during the removal process.
For added safety and future maintenance, inspect the joints for signs of wear as recommended for nursery gliders.
Tools for Leg Removal
Three essential tools will help you remove the legs from your IKEA chair safely: a power drill or screwdriver, a soft surface to protect the frame, and a container to hold screws and small parts.
Begin by placing the chair upside down on the soft surface to prevent scratches during leg removal. Use the power drill or screwdriver to unscrew fasteners carefully, referencing the chair’s manual for specific leg attachment methods.
If dowels secure the legs, apply gentle twisting pressure to avoid wood damage. Keep all screws and small parts organized in the container to streamline reassembly.
This tools comparison guide guarantees you select the appropriate device for efficient removal, aligning with chair maintenance tips that preserve the frame’s integrity and support long-term use in your nursery glider assembly.
Safety Precautions During Removal
Before you start loosening the chair legs, make certain the chair sits firmly on a stable surface to prevent tipping or slipping. Wear appropriate safety gear, including gloves and eye protection, to shield yourself from potential injury. Verify proper lighting to clearly see screws and connection points, reducing errors. Use the correct tools, such as a screwdriver or wrench, applying steady pressure to avoid stripping screw heads. Keep all small parts like screws and washers organized and out of reach to maintain child supervision and prevent accidents. After removal, inspect the chair frame carefully for wear or damage before proceeding. Following these safety precautions protects both you and those you serve, guaranteeing a smooth, secure assembly process.
Measuring and Cutting the Plywood Base
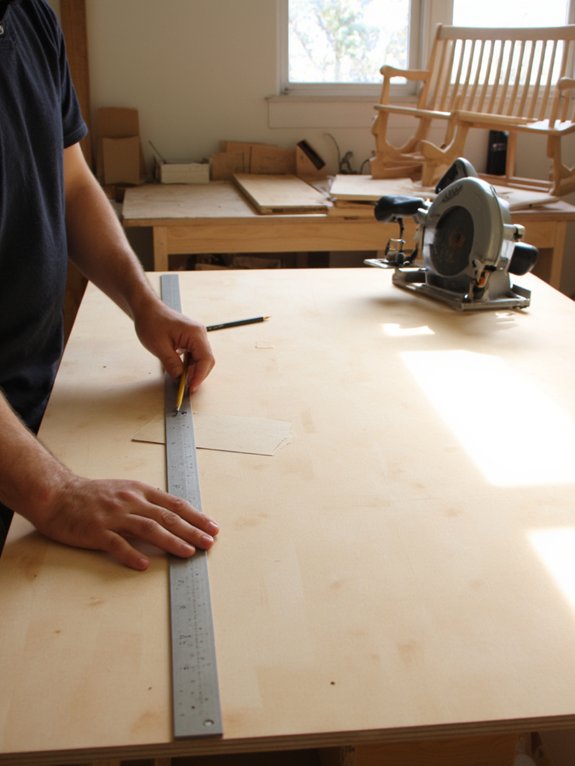
When preparing to cut the plywood base, you’ll first measure the bottom of your armchair to guarantee a secure fit. Take precise dimensions and mark cutting lines on the plywood using a straight edge and pencil. Consider plywood thickness carefully; it must support weight without adding excessive bulk. For clean, accurate cuts, use a circular saw or table saw—these tools deliver straight, even edges vital for stability. Cut the plywood slightly larger than the chair’s base, allowing for overhang on all sides. This overhang is essential to enhance the glider’s balance and structural integrity. After cutting, sand the edges thoroughly to remove splinters and create a smooth surface, ensuring safe handling and a secure attachment point for the glider assembly.
Attaching the Plywood Base to the Chair Frame
Start by removing the legs from your IKEA chair or verifying they’re not installed during assembly to create unobstructed access for attaching the plywood base.
Pay close attention to plywood thickness considerations to guarantee strength without excess weight. When selecting your materials, keep in mind that a weight capacity of up to 300 pounds is ideal for reliable and long-lasting use.
Follow these steps:
- Align the plywood precisely with the chair frame, focusing on screw placement strategies to distribute load evenly.
- Use about 10 screws, each 1 3/4 inches or longer, drilling them evenly to prevent wobbling and secure the base firmly.
- After securing the plywood, double-check tightness and stability using glider stability techniques to verify the chair supports smooth rocking.
This method guarantees a stable, durable foundation for your nursery glider, enhancing safety and comfort for those you serve.
Positioning the Glider Base for Optimal Movement
Position the glider base so its curvature aligns precisely with the chair frame to guarantee smooth rocking.
Leave enough clearance between the base and chair sides to prevent any interference during movement.
Test the motion gently before securing the base with screws for stable, balanced rocking.
For best results, ensure that the rocking, swiveling, and reclining capabilities of your glider are unimpeded by checking the alignment and spacing before final assembly.
Aligning the Base Correctly
Although aligning the glider base may seem straightforward, centering it accurately on the plywood is essential for ensuring an even rocking motion.
Proper glider base positioning guarantees a smooth gliding motion and prevents wobbling or tipping.
Follow these steps to align the base correctly:
- Center the base precisely on the plywood, measuring equal distances from each edge.
- Adjust the gap between the base and plywood edge to avoid obstructions during rocking.
- Use clamps to hold the base firmly while marking screw locations, then perform stability checks to confirm level alignment.
Adjusting for Smooth Rocking
When you place the glider base on the plywood, ascertain it’s perfectly centered to maintain balance during rocking.
Adjust the distance between the glider base and the chair’s frame carefully, assuring the rocking techniques produce a smooth, unobstructed motion. Many modern gliders utilize noise-free operation mechanisms, ensuring that gentle movement won’t disturb quiet moments in the nursery.
Use 1-inch screws to firmly secure all contact points, leveraging the durability of quality glider materials for stability.
Test the motion by gently pushing the chair back and forth, paying close attention to comfort factors like fluidity and resistance.
If you detect any hindrance, make minor adjustments to optimize performance.
This precise positioning maximizes both safety and comfort, serving those who rely on the nursery glider for soothing movement.
Fine-tuning at this stage guarantees the rocking experience is seamless and reliable.
Ensuring Stable Movement
To achieve stable movement, you’ll want to place the glider base centrally on the plywood, guaranteeing balanced weight distribution for a smooth rocking motion.
Position the base parallel to the chair’s backrest to maximize steadiness during use. Secure it firmly with screws to prevent wobbling. Many users appreciate the locking mechanism feature found in top models like the Jocisland Swivel Glider, which helps keep the glider securely in place during use.
After installation, test the rocking motion and adjust as necessary for comfort.
Follow these steps for ideal stability:
- Center the glider base precisely to distribute weight evenly.
- Align the base parallel to the backrest to support controlled movement.
- Perform regular stability checks on all attachment points to maintain safety.
Consistent stability checks will guarantee the glider offers a smooth, safe rocking motion, providing lasting comfort for those you serve.
Securing the Glider Base to the Plywood
Center the glider base on the plywood to confirm balanced rocking and stability.
Begin by carefully aligning the glider base to guarantee proper glider base alignment, which is vital for smooth motion.
Careful glider base alignment is essential to ensure smooth, reliable motion and optimal performance.
Position it precisely in the center, considering plywood stability considerations to prevent uneven wear.
Use 1-inch screws for secure attachment; insert each screw straight to avoid splitting the wood.
Follow screw installation tips by placing at least four screws evenly on each side of the base, distributing force uniformly.
If possible, use a power drill to speed up installation while maintaining control. For added durability, refer to the 25,000-cycle life test standard to ensure your assembly meets high-reliability expectations.
Before fully tightening screws, double-check alignment to confirm the glider moves freely.
This method provides a robust, stable connection, essential for the nursery glider’s long-term safety and functionality.
Tightening Screws and Ensuring Stability
Tighten all screws firmly to eliminate any wobbling or instability in the glider chair. Use precise screw tightening techniques by applying the recommended torque values specified in the assembly instructions.
After initial assembly, perform stability assessment methods by gently rocking the chair to detect any looseness. If instability arises, recheck connections and retighten as needed.
To maintain peak safety and stability, follow these regular maintenance tips:
- Inspect all screws periodically for loosening caused by rocking vibrations.
- Use a calibrated screwdriver to guarantee consistent torque during retightening.
- Address any instability immediately by reviewing assembly steps and reinforcing loose fasteners.
Adhering to these steps guarantees your nursery glider remains secure, stable, and safe for continued use.
Testing the Rocking Motion of the Glider
Once you've completed assembly, test the rocking motion by gently pushing the glider back and forth to guarantee smooth and consistent movement. Perform glider stability checks by ensuring all screws are tightened and components aligned. If you detect uneven rocking or wobbling, adjust the glider base position for ideal comfort and function. Movement smoothness testing includes inspecting for obstructions that may impede the rocking mechanism. For added durability and performance, consider the steel and solid wood frame design often found in high-quality nursery chairs, as this contributes to long-term stability. Use the table below to systematically evaluate performance and necessary adjustments:
| Test Aspect | Observation | Action Required |
|---|---|---|
| Rocking Smoothness | Smooth / Rough | Adjust base position |
| Stability | Stable / Wobbly | Tighten screws, verify alignment |
| Obstruction Presence | None / Present | Remove obstruction |
| Overall Comfort | Comfortable / Uncomfortable | Modify rocking mechanism settings |
Troubleshooting Common Assembly Issues
If you encounter difficulties fitting parts together, first verify that you have all components and refer to the assembly videos to confirm proper alignment.
These glider assembly tips help avoid common mistakes and streamline your process. Use these troubleshooting techniques to resolve typical issues:
- For loose connections, make certain all screws are tightened securely and review the assembly steps to confirm accuracy.
- If the glider doesn’t rock smoothly, check that the base is correctly positioned on the plywood and all screws are fastened.
- When instability occurs, re-examine the assembly and tighten any loose screws or joints before use.
If problems persist, consult the assembly videos again or contact support for additional guidance.
Following these steps guarantees a stable, functional nursery glider.
Safety Tips for Nursery Glider Use
Because safety depends heavily on proper assembly and maintenance, you should always verify all screws and connections are securely tightened before using the nursery glider.
Follow the assembly guidelines meticulously to confirm structural integrity and prevent hazards. Regularly check the glider’s stability, especially after initial setup and significant use, to maintain peak glider safety. The MAMAZING Rocking Chair, for example, is designed with sturdy construction for stability while rocking, which reduces the risk of tipping or accidents.
Keep the assembly area free of distractions and secure small parts away from children until assembly is complete. Always supervise children during glider use to prevent falls or injuries, making sure the glider is used only as intended.
Adhering to manufacturer’s safety recommendations and maintaining vigilant child supervision will uphold a safe environment, allowing you to serve and protect those in your care effectively.
Maintaining and Caring for Your Nursery Glider
Maintaining your nursery glider starts with regular inspections to verify all screws and connections remain tight and the chair stays stable.
Following glider maintenance tips guarantees safety and prolongs usability. Focus on these key care steps:
- Use upholstery cleaning methods recommended by the manufacturer—wipe wooden parts with a soft, damp cloth and wash removable slipcovers per care labels to prevent fabric deterioration.
- Inspect and tighten hardware monthly to maintain structural integrity, reducing the risk of wobbling or accidents.
- Apply storage solutions advice by keeping the glider in a dry, shaded area to avoid material fading and damage caused by sunlight or moisture.
Consistent care not only preserves the glider’s appearance but also supports a safe, comfortable environment for those you serve.
Frequently Asked Questions
How to Build a Glider Chair Step by Step?
You’ll start by selecting glider chair materials and choosing glider style fitting your nursery. Assemble firmly, then follow glider maintenance tips—tighten screws, lubricate joints—to guarantee smooth, safe rocking that comforts both you and your little one.
How to Assemble a Glider Rocker?
To assemble a glider rocker, choose best glider materials like durable wood or metal. Consider glider design options for comfort. Secure all parts tightly, then follow glider maintenance tips to guarantee smooth, safe rocking motion.
Are Nursery Gliders Worth It?
You’ll find nursery gliders worth it due to comfort benefits and ergonomic design options. When you compare prices, investing in quality models balances cost with long-term use, serving both you and your child effectively.
What to Do With a Nursery Glider?
You’ll transform your nursery with glider benefits, creating unmatched nursery comfort and a soothing experience. Use it for rocking, feeding, bonding, or reading, ensuring your baby feels secure and loved while you nurture peacefully.
Final Thoughts
Assembling your nursery glider might seem intimidating, but with careful steps, it’s straightforward and rewarding. You might worry about the time it takes, but investing a bit now secures a safe, smooth rocking experience for years. Follow each step precisely, use the right tools, and don’t rush. Proper assembly not only assures comfort but also enhances your nursery’s safety and durability, making every moment with your little one more enjoyable and secure.
If you want to know other articles similar to Step-by-Step Guide to Assembling Nursery Gliders you can visit the Gliders & Rocking Chairs category.
Top Gliders for Tall Parents: Comfort & Support
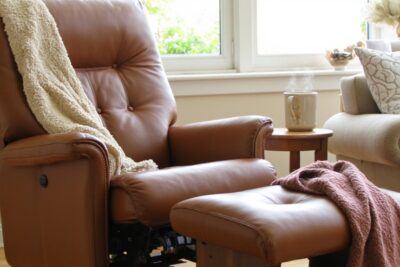
What Makes a Glider Recliner With Ottoman Ideal?

Top 3 Gliders for Nursing Comfort

What Are Hypoallergenic Glider Fabrics for Babies?

Top Nursery Gliders With Handy Side Storage Pockets
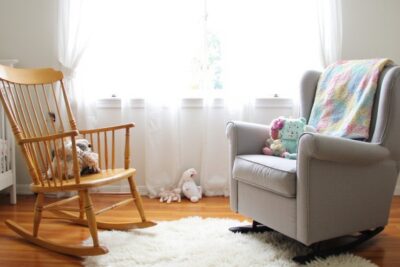
Choosing Between Rocking Chair and Glider for Nursery

5 Best Eco-Friendly Nursery Rocking Chairs

What Glider Chairs Offer Lumbar Support for Nurseries?

Best Minimalist Nursery Glider Chair Designs
This is also interesting