













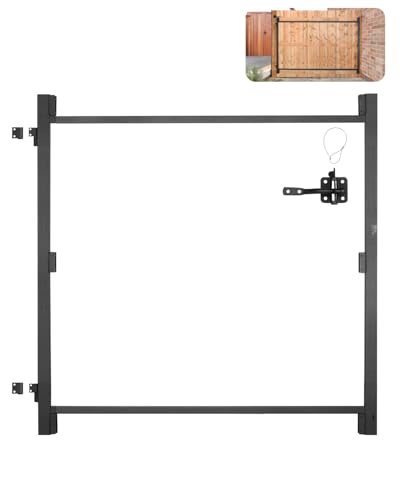



What Is Hardware Mounted Baby Gate Installation?


Hardware mounted baby gate installation means you firmly secure the gate directly into wall studs using screws and brackets, ensuring maximum stability and safety. Unlike pressure-mounted gates, these are more durable and won’t loosen over time, making them ideal for high-risk areas like staircases. You’ll use tools like a stud finder, drill, and level to properly align and attach the gate. With the right approach, you create a reliable barrier that protects your child. To understand the full process and advantages, keep exploring the details.
Table
- Main Points
- Understanding Hardware Mounted Baby Gates
- Key Benefits of Hardware Mounted Installation
- Essential Tools and Materials Needed
- Preparing the Installation Area
- Locating Wall Studs for Secure Mounting
- Step-by-Step Installation Process
- Ensuring Proper Gate Alignment and Fit
- Testing Stability and Security of the Gate
- Maintenance and Regular Safety Checks
- Comparing Hardware Mounted to Pressure Mounted Gates
- Common Installation Challenges and Solutions
- Frequently Asked Questions
- Final Thoughts
Main Points
- Hardware mounted baby gate installation involves securely attaching the gate to wall studs using screws for permanent, stable safety barriers.
- It requires tools like a stud finder, drill, screwdriver, level, and measuring tape to ensure precise alignment and secure mounting.
- Installation begins with locating wall studs, marking drill points, and drilling pilot holes for strong attachment to structural supports.
- The gate is mounted by fastening brackets to studs, aligning the gate properly, and verifying stability with level checks and gentle tugs.
- Regular maintenance includes inspecting hardware for looseness, testing locking mechanisms, and ensuring the gate remains level and firmly secured.
Understanding Hardware Mounted Baby Gates
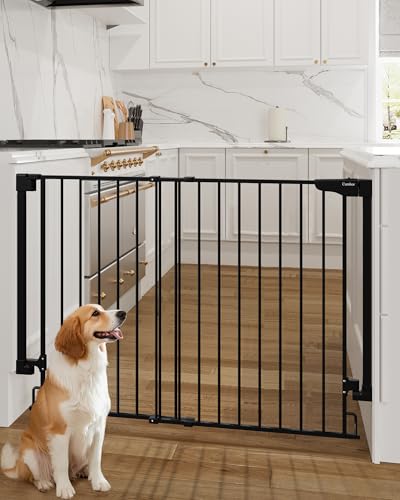
Hardware-mounted baby gates provide a secure barrier by attaching directly to wall studs, making them the safest choice for high-risk areas like staircases.
When you approach gate installation, you’ll find these gates constructed from durable materials such as wood or metal, ensuring they withstand pressure from children or pets. Unlike pressure-mounted options, they require you to drill pilot holes and screw the gate firmly into the wall or door frame, offering a permanent safety solution. Pressure-mounted gates, such as the Regalo Easy Fit, are not recommended for use at the top of stairs due to safety concerns.
While this process alters the wall’s appearance, careful installation minimizes damage, and many gates come in styles that complement your home decor.
If you’re unsure about handling tools, consider professional assistance to guarantee a secure and reliable setup that prioritizes safety in your living space.
Key Benefits of Hardware Mounted Installation

Because safety is paramount in areas like staircases, installing baby gates with hardware mounting offers unmatched security.
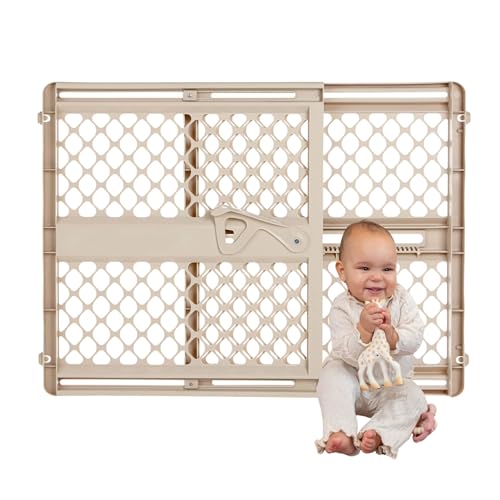
Hardware-mounted gates anchor firmly into wall studs, guaranteeing the gate resists being pushed over or dislodged, especially in high-risk spots. Many models, such as the Toddleroo Supergate Ergo, offer both pressure-mounted and hardware-mounted installation options for added versatility.
When you install these gates in a doorway or opening, you create a stable, permanent barrier that children and pets can't easily remove or shift.
Unlike pressure-mounted options, these gates use screws to guarantee a solid fixture, minimizing movement and enhancing durability.
By choosing hardware-mounted gates, you prioritize long-term safety and reduce the risk of accidents.
To serve those you care for best, verify the installation is secure and correctly positioned, providing reliable protection where it matters most.
Essential Tools and Materials Needed

Before you begin installing your baby gate, gather all the essential tools and materials to guarantee a smooth and secure setup. You’ll need a stud finder to locate wall studs, a drill and screwdriver for fastening, a level and measuring tape to ascertain precise alignment, and a pencil to mark drill points. Don’t forget safety goggles to protect your eyes from dust and debris during drilling. The materials include the baby gate, mounting brackets or hardware provided with the gate, and possibly extra screws or anchors depending on your wall type. Having these ready will help you install the gate securely, assuring safety for those you serve. Also, keep a clean cloth or vacuum nearby to tidy up after installation, maintaining a safe environment.
Preparing the Installation Area

Once you've gathered all the tools and materials, focus on preparing the installation area carefully. Proper preparation is critical to guarantee your mounted safety gates meet safety standards and provide a secure barrier for your loved ones.
Begin by selecting a location free from hazards like stairs or sharp objects. Clear the space of furniture and obstacles so you can work efficiently during the installation process. For best results, ensure the area is suitable for tool-free installation to simplify setup and reduce the risk of errors.
Review the manufacturer’s guidelines to confirm you understand specific requirements for your gate model.
- Choose a hazard-free location for ideal safety
- Remove all obstructions to allow easy access
- Confirm compliance with safety standards before starting
- Prepare tools and materials within reach to avoid delays
Taking these steps guarantees a smooth, safe installation experience that protects those you care about most.
Locating Wall Studs for Secure Mounting

To mount your baby gate securely, start by using a stud finder to locate the wooden studs behind your drywall, which are usually spaced 16 or 24 inches apart.
Once you identify a stud, mark the exact spot with a pencil to verify precise drilling for the mounting brackets.
Accurate marking and locating studs are essential steps to assure the gate's stability and safety.
For added peace of mind, consider models with SecureTech Indicator features that provide visual confirmation of proper installation and locking.
Tools for Stud Finding
Anyone installing a hardware-mounted baby gate needs reliable tools to locate wall studs, as these provide the most secure points for mounting.
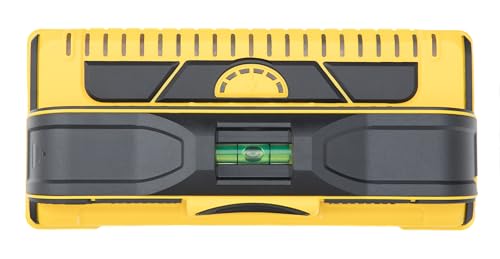
Stud finders are your best ally, ensuring gates are suitable for safe use by detecting studs hidden behind drywall. You’ll find two main types: magnetic, which senses nails or screws, and electronic, which spots density changes.
Use them carefully to guarantee secure mounting.
Keep these tips in mind:
- Choose the right stud finder for your wall type
- Move the device slowly to avoid false readings
- Confirm stud location by listening for a solid sound when knocking
- Mark stud positions clearly before drilling
Using these tools thoughtfully helps protect your loved ones by securing gates firmly.
Identifying Stud Locations
Three reliable methods can help you identify stud locations accurately, guaranteeing your hardware-mounted baby gate is securely anchored.
First, use a stud finder, an affordable tool that detects studs behind the drywall, providing precise locations on the wall.
Second, tap the wall lightly with a hammer; a solid sound indicates a stud, while a hollow sound suggests no stud is present.
Third, if you don’t have a stud finder, use a magnet to locate screws or nails, which are fastened directly into studs.
Remember, studs typically sit 16 to 24 inches apart, so once you find one, measure to find adjacent studs.
Identifying these spots is critical to guarantee your baby gate is securely mounted and provides reliable safety.
Marking Mount Points
Although finding the studs is essential, accurately marking their locations is what guarantees your hardware-mounted baby gate will hold securely.
Use a stud finder to detect the studs, then mark each spot with a pencil to guide precise placement of the mounting brackets. Remember, studs typically sit 16 to 24 inches apart, so check several points to confirm.
Before finalizing the installation, drill pilot holes at these marks and verify the gate’s height is level and fits your space perfectly. This careful preparation will safeguard your child and give you peace of mind.
- Protect your little one with a sturdy, reliable barrier
- Prevent accidents by securing mounting brackets into solid studs
- Feel confident in every step of your installation process
- Serve your family’s safety with expert care and precision
Step-by-Step Installation Process
Before you start drilling, you’ll want to locate the wall studs with a stud finder to guarantee the baby gate mounts securely. Next, mark the desired height—usually around 30 inches from the floor—and use a level to draw a straight line for precise placement. Drill pilot holes at these marks, making sure they align with the studs for maximum support. Attach the mounting brackets securely by fastening screws into the pilot holes, tightening them firmly to prevent any movement. For added stability, consider using a gate that features a double safety lock, which is simple for adults to operate but difficult for children, enhancing overall security. Finally, connect the baby gate to the mounted brackets. Once installed, gently tug the gate to confirm it’s firmly in place. Following this installation process carefully guarantees the gate provides a safe, stable barrier for your child.
Ensuring Proper Gate Alignment and Fit
You’ll want to start by accurately measuring the doorway dimensions to guarantee the gate fits snugly without gaps.
Adjust the gate position carefully so it sits flush against the wall or banister, maintaining stability and safety.
Using a level and checking the frame’s squareness will help you confirm proper alignment before tightening all hardware securely.
Measuring Doorway Dimensions
When measuring your doorway for a hardware mounted baby gate, take precise width measurements to ascertain a snug fit without gaps.
Accurate measuring doorway dimensions ascertains your gate aligns perfectly, promoting secure mounting and safety. Use a level to confirm the height is even, accounting for baseboards or molding that may require adjustments.
Also, check for obstructions like door handles that might interfere with installation.
- Feel confident knowing your measurements protect your child from unsafe gaps
- Experience peace of mind with a securely mounted gate
- Take pride in providing a safe environment through careful adjustments
- Trust that your diligence prevents future hazards
Adjusting Gate Position
Although measuring the doorway accurately is essential, adjusting the gate position guarantees a secure and proper fit. You’ll want to keep in mind the gate’s alignment by using a level tool to verify it swings freely without dragging or being too high. Adjust the hinges and latch as needed, and if the opening isn’t square, use shims to fill gaps for a snug fit. Secure the gate firmly to wall studs with appropriate screws to prevent movement. Regularly check alignment over time, as shifts in walls or floors can affect safety and functionality.
| Step | Action | Purpose |
|---|---|---|
| Measure | Check doorway width | Confirm initial dimensions |
| Level | Use tool for gate alignment | Verify free swinging |
| Adjust | Modify hinges and latch | Achieve proper fit |
| Shim & Secure | Fill gaps and fix to studs | Stabilize and tighten gate |
Testing Stability and Security of the Gate
A securely installed baby gate provides crucial protection, so it’s important to test its stability and security thoroughly after mounting. Gates can't protect your little one if they wobble or loosen over time.
After installation, gently tug the gate in one spot to verify it’s firmly fastened. Confirm the gate is perfectly level to avoid less comfortable or unsafe usage, and test the latch mechanism multiple times to ensure smooth operation. The HOMEAL gate’s top-mounted locking mechanism is designed for enhanced safety, so make sure this feature clicks solidly and resists accidental openings during your checks.
- Feel confident knowing the gate won’t budge under pressure
- Protect your child from potential hazards with a reliable barrier
- Avoid the worry of a failing gate compromising safety
- Ensure peace of mind every time you pass through
Taking these steps shows your commitment to your family’s safety and well-being.
Maintenance and Regular Safety Checks
After confirming your baby gate is stable and secure, maintaining its safety requires ongoing attention. You should perform routine inspections of the hardware and mounting points, checking for wear or looseness that could compromise safety compliance. Gently tug on the gate to guarantee it stays firmly fastened without wobbling. Use a maintenance checklist to verify the proper function of safety latches and locking mechanisms, making sure they’re free of dirt or debris. Choosing gates made from durable construction can help minimize frequent repairs and extend long-term reliability. Keep the area around the gate clear of small objects that might create tripping hazards or interfere with operation. Finally, document each inspection and any repairs to monitor the gate’s condition over time. By following these steps, you uphold a safe environment for those you serve.
Comparing Hardware Mounted to Pressure Mounted Gates
When choosing between hardware-mounted and pressure-mounted gates, you need to weigh installation methods, safety, and portability carefully.
Hardware-mounted gates offer superior stability by securing directly into wall studs but require drilling and are fixed in place.
Pressure-mounted gates install quickly without tools and can be moved easily, though they lack the same level of security, especially in high-risk areas.
For added convenience and wall protection, pressure mount hardware used in some gates provides a drill-free installation option while maintaining reliable safety.
Installation Method Differences
Although both hardware-mounted and pressure-mounted baby gates serve the purpose of keeping your child safe, they differ greatly in installation methods and suitability for various areas. Hardware-mounted gates use installation techniques involving drilling into wall studs, pilot holes, and screws, creating a permanent, secure barrier ideal for high-risk zones like stair tops. Pressure-mounted gates rely on adjustable tension and don’t require tools, making them easy to reposition but better for low-risk areas such as doorways or stair bottoms.
Consider these differences carefully:
- Hardware-mounted gates provide lasting security where it matters most
- Pressure-mounted gates offer flexibility without damaging walls
- Installation techniques impact gate types and their safety considerations
- Choosing the right gate respects your home’s structure and your child’s safety needs
Safety and Stability
Understanding the differences in installation methods naturally leads to evaluating how these choices affect safety and stability.
Hardware-mounted gates, secured into wall studs following strict installation guidelines, offer superior resistance to being pushed or dislodged. This makes them essential for complying with safety regulations, especially in high-risk areas like stairways.
Unlike pressure-mounted gates, which can shift under persistent force, hardware-mounted gates remain firmly in place, providing reliable childproofing. Their durable materials—wood, metal, or reinforced mesh—enhance safety by preventing accidental falls or escapes.
When installing, you must carefully follow childproofing tips to guarantee the gate’s stability and longevity. By choosing hardware-mounted gates and adhering to proper installation guidelines, you create a safer environment that truly protects your little ones.
Portability and Flexibility
Since hardware-mounted baby gates are firmly secured to wall studs, they offer unmatched stability but lack portability. Unlike pressure-mounted gates, which you can quickly install and relocate within minutes, hardware-mounted gates demand more complex installation timeframes involving drilling and permanent mounting.
Their gate design features focus on fixed safety, making them ideal for high-risk areas like staircases. User reviews often highlight this trade-off: superior security versus limited flexibility. If you need a gate that moves with your needs, pressure-mounted versions might serve better.
However, when safety is paramount, especially in critical zones, hardware-mounted gates remain the cautious choice.
- Permanent wall modifications guarantee peace of mind
- Limited relocation restricts versatility
- Quick setup of pressure-mounted gates appeals to busy caregivers
- Stability trumps portability where risk is highest
Common Installation Challenges and Solutions
Installing a hardware-mounted baby gate comes with specific challenges that you need to address carefully to guarantee safety and durability. You’ll want to avoid common installation mistakes by using proper gate mounting techniques and following installation troubleshooting tips. For example, locating studs accurately is key, as is drilling pilot holes carefully to maintain wall integrity. Remember to keep the gate level and tightly secured to prevent hazards. Here’s a quick overview:
| Challenge | Solution |
|---|---|
| Finding studs | Use a stud finder, measure well |
| Drilling pilot holes | Use correct drill bit size |
| Wall damage from drilling | Fill holes and repaint if needed |
Frequently Asked Questions
What Is a Hardware-Mounted Baby Gate?
You’ll find hardware-mounted baby gates feature sturdy materials and secure brackets to guarantee child safety. The installation process involves drilling into studs, creating a reliable barrier that won’t easily move or fall, protecting your little ones effectively.
What Is the Difference Between Pressure Mounted and Wall Mounted Baby Gates?
Like a knight choosing armor, you’ll find gate types differ: pressure-mounted install fast without tools, while wall-mounted require drilling. The latter’s safety features secure gates sturdily, ideal for protecting your loved ones in risky spots.
Can You Install a Baby Gate Without Drilling Into the Wall?
You can install a baby gate without drilling by using alternative installation methods like pressure-mounted gates. Choose baby gate materials wisely, and protect walls with padding or wall protectors to prevent damage while ensuring safety and durability.
How Safe Are Pressure Mounted Baby Gates?
Pressure-mounted gates offer safety features like easy installation and gentle wall contact, but you must follow installation tips closely. For top stairs, choose childproofing strategies ensuring firm mounting—pressure gates suit low-risk spots, not high-risk areas.
Final Thoughts
While you might worry that hardware mounted baby gates are tricky to install, with the right tools and careful preparation, you’ll find the process straightforward and secure. Unlike pressure-mounted gates, hardware mounts provide unmatched stability, ensuring your little one stays safe even during active play. By following proper installation steps and regularly checking the gate’s sturdiness, you’ll have peace of mind knowing you’ve taken the safest route to protect your child effectively.
If you want to know other articles similar to What Is Hardware Mounted Baby Gate Installation? you can visit the Baby Gates & Safety Systems category.
Best Baby Safety Gates for Pets and Babies

10 Baby Proofing Tips for Open Floor Plans
What Are the Most Stylish Baby Gates?

3 Best Wooden Baby Gates With Walk-Through Doors

10 Best Baby Gates for Outdoor Decks

What Baby Gates Work for Irregular Shaped Spaces?

Best Extra Long Baby Gates for Playrooms

Best Extra Tall Baby Gates for Toddlers

Why Choose a Baby Gate With Cat Door?
This is also interesting