










How to Install a Pressure Mounted Baby Gate for Stairs

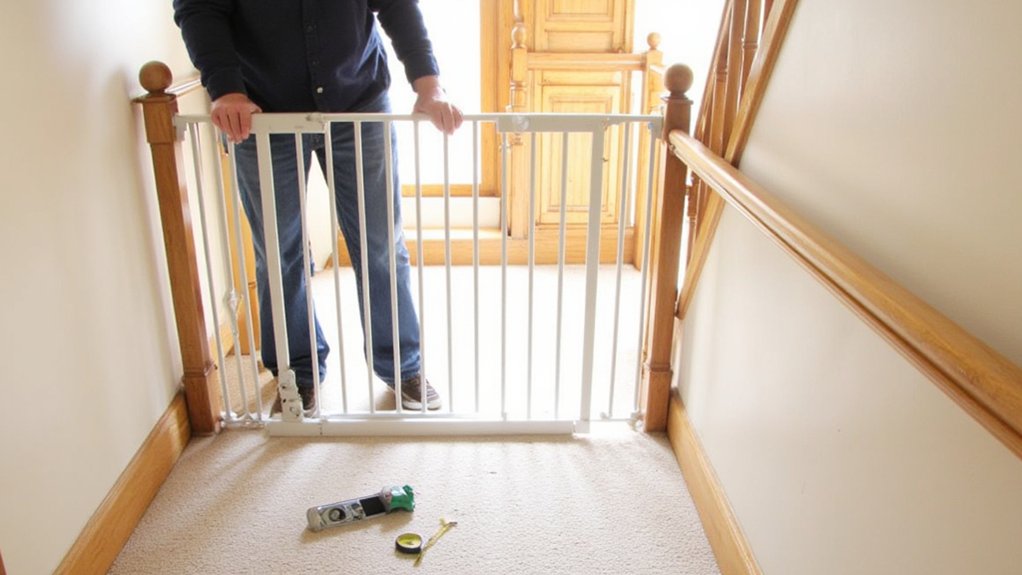
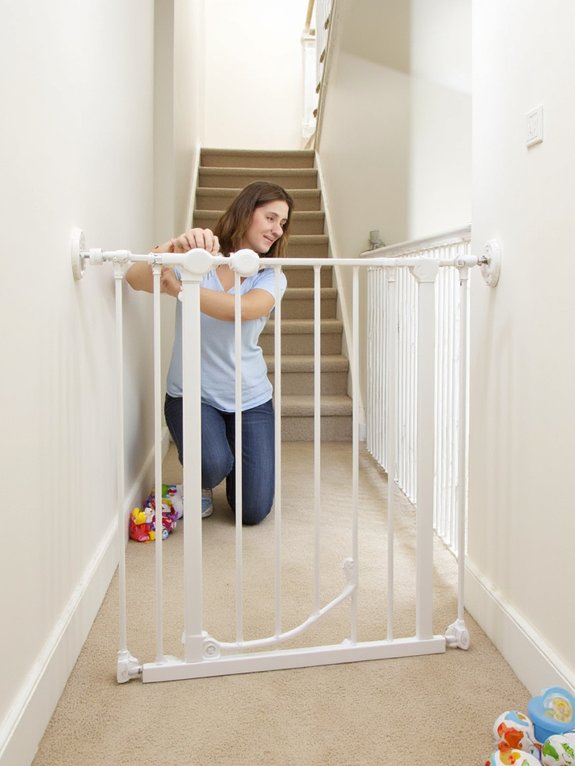
To install a pressure mounted baby gate at the bottom of stairs, first measure the opening’s narrowest width to guarantee a snug fit. Avoid the top of stairs due to safety risks. Position the gate firmly against stable surfaces, tighten the pressure bars evenly using tension knobs, and check that there are no gaps or height hazards. Regularly inspect the gate for stability and secure locking mechanisms. Keep these basics in mind to set up a safe barrier, and you can explore additional tips for maintenance and safety.
Table
- Main Points
- When to Use a Pressure Mounted Baby Gate at the Stairs
- Measuring Your Staircase for a Pressure Mounted Gate
- Choosing the Right Pressure Mounted Gate for Stairs
- Preparing the Stair Area for Gate Installation
- Understanding the Components of a Pressure Mounted Gate
- Positioning the Gate at Least Six Inches From the Top Step
- Adjusting the Pressure Bars for a Secure Fit
- Installing Wall Cups to Prevent Gaps
- Securing the Gate Using the Pressure Lock Mechanism
- Checking Gate Stability and Safety Compliance
- Tips for Maintaining Your Pressure Mounted Gate
- Common Installation Challenges and How to Overcome Them
- When to Replace Your Pressure Mounted Stair Gate
- Ensuring Child Safety Beyond Gate Installation
- Frequently Asked Questions
- Final Thoughts
Main Points
- Avoid installing pressure-mounted gates at the top of stairs due to safety risks; use them only at the bottom or in less hazardous areas.
- Measure the narrowest width of the stairway opening and ensure the gate fits snugly between 26 to 62 inches.
- Position pressure bars firmly against walls, tighten evenly using tension knobs, and ensure the gate is level and stable.
- Install wall cups to distribute pressure evenly and prevent gate loosening under tension, securing the gate firmly.
- Regularly inspect and tighten the gate fittings monthly, replacing it if damaged or if gaps exceed three inches for safety.
When to Use a Pressure Mounted Baby Gate at the Stairs
Although pressure-mounted baby gates offer easy installation, you should generally avoid using them at the top of stairs due to safety risks like instability and trip hazards.
Pressure-mounted gates can shift or loosen, increasing the danger of falls, which is a primary safety concern at the top of the stairs. If you must use one there, consider placing an extra tall gate one step down to reduce risk.
These gates work best in less hazardous areas such as doorways or between rooms. Always check that the gap between the floor and gate base doesn’t exceed three inches to prevent your child from slipping through.
Regular inspections are essential to guarantee the gate stays secure and properly fitted, especially in high-traffic stair areas.
Measuring Your Staircase for a Pressure Mounted Gate
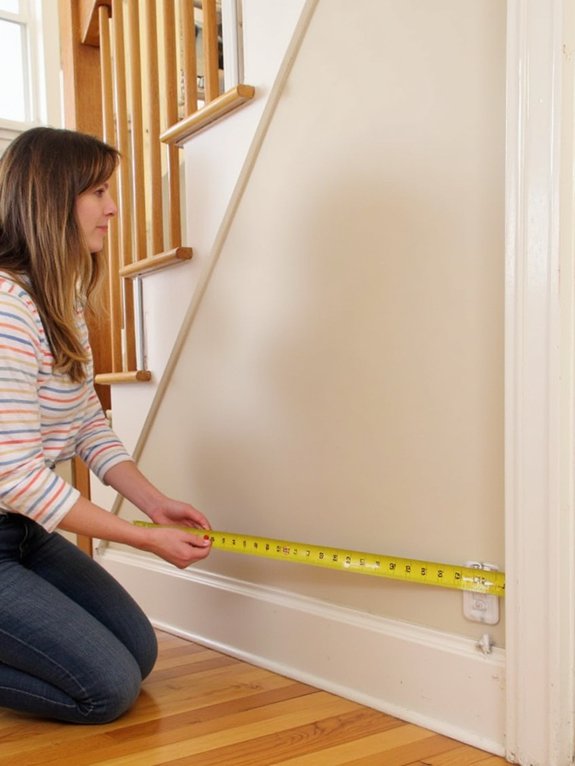
Before installing a pressure mounted gate, you’ll need to measure your staircase carefully to verify a secure fit.
Start by measuring the width of the opening at its narrowest point, usually between 26 to 62 inches, to verify the gate fits the opening properly.
Measure 6 inches back from the edge of the top stair to avoid hazards.
Don’t forget to account for skirting boards or baseboards by measuring from the wall to the baseboard edge, as these affect the installation area.
Use a level to check that the surface is even, since uneven areas can compromise stability.
Finally, consider any handrails or banisters that might obstruct placement.
Accurate measuring is key for a safe, secure gate install.
Choosing the Right Pressure Mounted Gate for Stairs
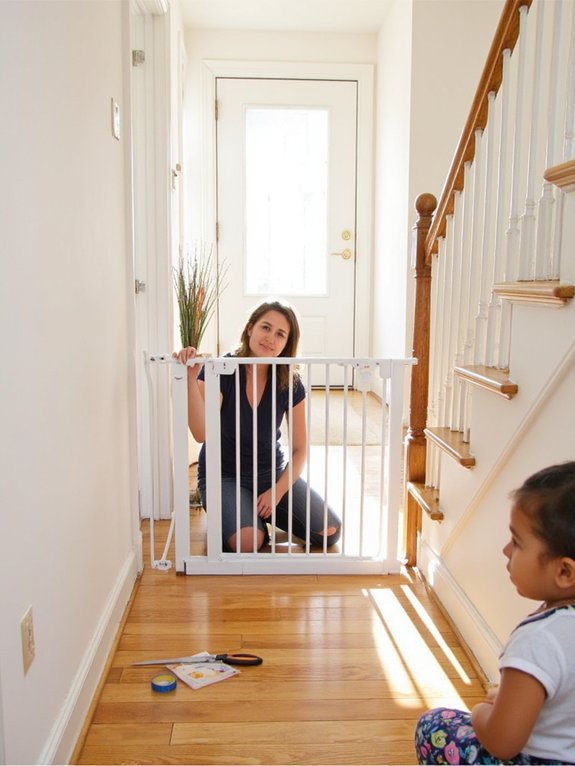
When choosing a pressure-mounted gate for your stairs, prioritize an extra-tall design to reduce trip hazards and guarantee it meets safety standards like EN1930:2011.
You'll want a gate that fits your stair width securely and includes features that enhance stability.
Gate Height Considerations
Choosing the right pressure-mounted baby gate for stairs starts with ensuring the gate height is at least 30 inches to prevent your child from climbing over.
When considering gate height, also check that the gap between the floor and the base doesn’t exceed three inches to stop crawling.
Measure your stairway opening carefully—pressure-mounted gates typically fit widths between 26 and 38 inches, with extensions available for larger spaces. For added convenience, many tool-free installation models make setup faster and help avoid wall damage.
If you’re installing the gate one step down from the top, opt for an extra tall model to avoid trip hazards.
Prioritizing these gate height considerations helps you select safety gates that effectively protect your child, ensuring peace of mind while serving your family’s needs with pressure-mounted gates designed for stairways.
Safety Compliance Standards
Though pressure-mounted baby gates offer convenience, you must make sure the gate meets key safety compliance standards to protect your child effectively.
Unlike hardware-mounted gates, pressure-mounted safety gates must still comply with strict guidelines to guarantee reliability and prevent accidents. Some models, such as the Fairy Baby Extra Wide Baby Gate, are designed with double locking mechanisms to further enhance safety and ease of use for adults.
When choosing your gate, focus on these essentials:
- Confirm it complies with the European Safety Standard EN1930:2011 or has JPMA certification.
- Avoid older or accordion-style gates that may have unsafe gaps.
- Ensure the gate fits snugly with no gap exceeding three inches from floor to base.
Preparing the Stair Area for Gate Installation
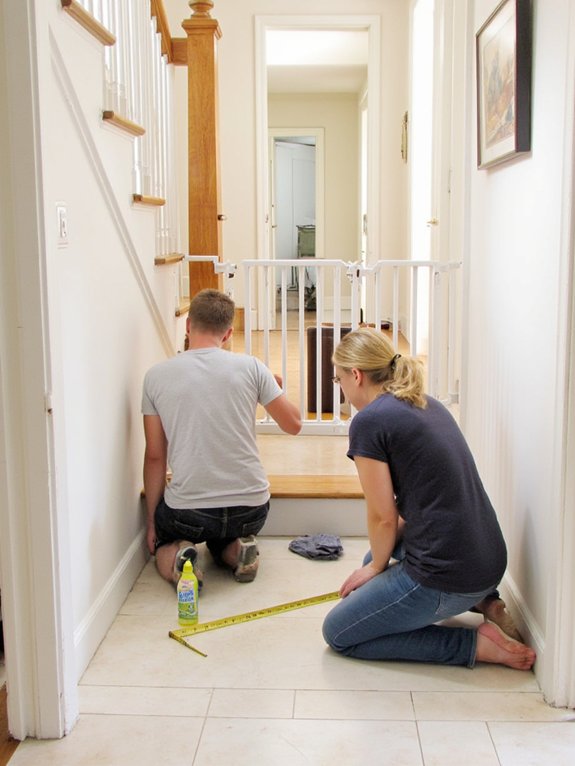
A secure baby gate starts with properly preparing the stair area. First, measure the opening carefully to confirm the gate fits snugly—most gates accommodate widths between 26 and 62 inches. Next, verify that the area is clear of any obstacles like furniture or decor that could block the gate or impede access. Check the wall surfaces; avoid round or uneven banister posts, as they can undermine stability. Use wall cups to firmly secure the gate and eliminate gaps, enhancing safety. If your baseboards affect the gate's height, consider spacers to keep the gap between the floor and gate base under three inches. The pressure mount design is especially effective for indoor safety, as it leaves minimal marks and is easy to install without damaging walls or woodwork. These steps help create a safe, stable foundation before you proceed with installation.
Understanding the Components of a Pressure Mounted Gate
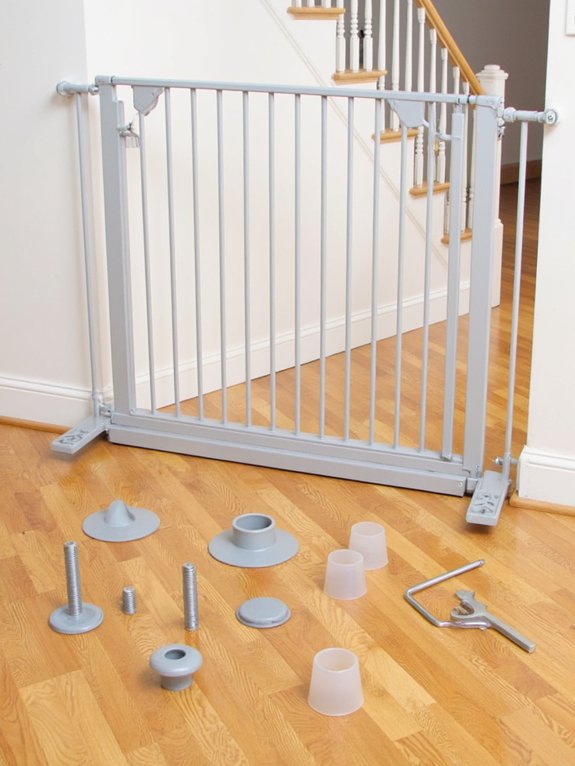
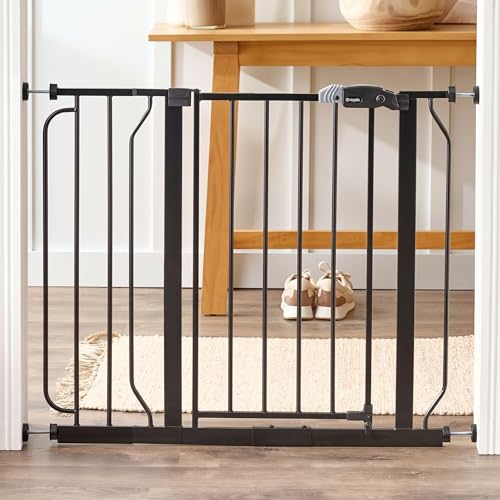
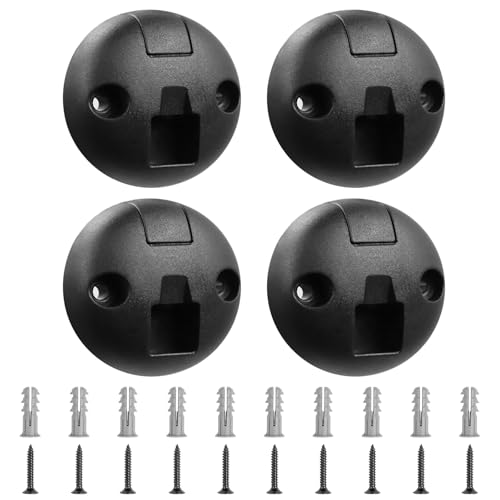
When installing a pressure mounted gate, you’ll work with key parts like the adjustable frame, tension spindles, and wall cups.
These components create a pressure fit by pressing firmly against the doorway without drilling.
Keep in mind, this setup is best for low-risk areas since it may not hold securely at the top of stairs.
Key Gate Parts
Understanding the key components of a pressure mounted baby gate helps you install it securely without drilling.
Each part plays a crucial role in keeping little ones safe on stairs. Focus on these three essential parts:
- Gate frame: This is the main structure that holds the gate together and provides the barrier you need.
- Pressure bar: Located at the top or bottom, it lets you adjust tension, ensuring the gate fits snugly against walls or door frames.
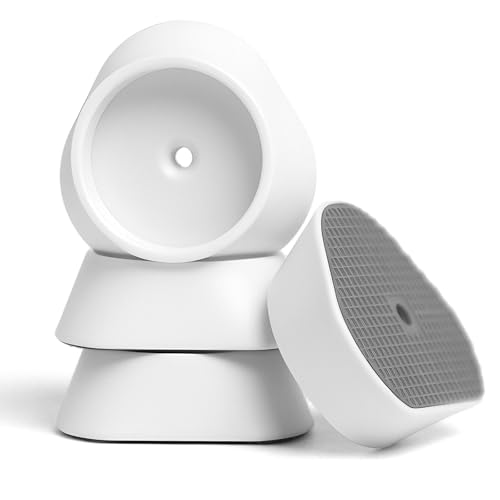
- Wall cups: These small fittings hold the adjustable spindles in place, preventing slipping and maintaining stability.
Pressure Fit Mechanism
Pressure fit mechanisms rely on four spindles—two at the top and two at the bottom—to secure the baby gate without drilling into walls.
When you install baby gates using this system, the locking mechanism creates tension against walls or door frames, holding the gate firmly while allowing easy removal when needed.
To guarantee safety, adjust the gate to fit the opening snugly—usually between 26 and 38 inches—and consider extensions for wider spaces.
Wall cups help eliminate gaps between the gate frame and walls, reducing hazards.
Regularly check that the spindles are tightened properly and the locking mechanism functions well.
By understanding and maintaining the pressure fit mechanism, you’ll provide a secure barrier that protects loved ones without damaging your home.
Positioning the Gate at Least Six Inches From the Top Step
Position the baby gate at least six inches back from the top step’s edge to create an essential safety buffer.
When you place the gate at the top of the stairs, guarantee it's positioned to prevent your child from reaching over or accidentally pushing it off balance. This distance is critical because:
- It reduces the risk of falling isn’t a major concern by keeping your child securely away from the stair edge.
- It provides a stable anchor point for the gate, preventing dislodging during use. Choosing a gate with a secure locking mechanism enhances this stability and safety.
- It avoids creating a trip hazard on the stairway, maintaining safe passage for everyone.
Always double-check the gate’s stability after installation to protect your loved ones effectively and serve your home with care.
Adjusting the Pressure Bars for a Secure Fit
Make sure the pressure bars are positioned firmly against the walls with no gaps before tightening.
Use the tension knobs to increase pressure gradually until the gate feels stable and doesn’t wobble.
Always test the gate by pushing and pulling to confirm it’s securely in place.
Positioning Pressure Bars
Before securing the baby gate, you’ll want to place the pressure bars firmly against the walls, guaranteeing they’re level and parallel to the floor.
Proper positioning is essential for a secure fit and the safety of those you care for. Follow these steps:
- Align the pressure bars so they sit flush against the wall mounts, avoiding any gaps that could cause instability.
- Mark the exact position of wall cups with a pencil to guarantee they’re perfectly aligned for mounting.
- Check that the gap between the floor and the gate base is no larger than three inches to prevent slipping hazards.
Taking these precautions guarantees the gate stays secure, giving you peace of mind while protecting little ones.
Tightening for Stability
To secure your baby gate firmly, tighten the pressure bars evenly on both the top and bottom spindles, guaranteeing the frame sits flush against the wall without any gaps. This equal pressure is key for the stability of pressure-mounted gates. Check that the gate’s base is no more than three inches from the floor to prevent tripping. Use wall cups for added stability, marking their placement before installation. For added assurance, some gates offer a SecureTech Indicator that visually confirms a proper and locked installation. After tightening, test the gate by gently pushing and pulling; if it wobbles, tighten further. Regularly inspect the pressure bars and spindles to maintain safety.
| Step | Action | Purpose |
|---|---|---|
| Tighten bars | Evenly on top & bottom | Guarantee secure, gap-free fit |
| Check base height | ≤ 3 inches from floor | Prevent tripping hazards |
| Test & inspect gate | Push/pull & monthly | Confirm ongoing stability |
Installing Wall Cups to Prevent Gaps
Three key steps guarantee your wall cups are installed correctly to prevent gaps between the baby gate and the wall.
Wall cups are essential for distributing pressure evenly and securing the gate frame.
To install them effectively:
- Mark the wall with a pencil where the wall cups will sit, keeping them level and aligned with the gate frame.
- Attach the wall cups securely using a screwdriver, positioning them no more than three inches above the floor to avoid trip hazards.
- Regularly check and tighten the wall cups to maintain stability and prevent slipping.
Securing the Gate Using the Pressure Lock Mechanism
Start by tightening the pressure spindles at the top and bottom of the gate until it fits snugly against the walls or door frame.
Then, turn the locking mechanism clockwise to engage the pressure lock firmly, ensuring the gate won’t wobble.
Finally, push against the gate to confirm it’s secure and won’t shift during use.
Adjusting Pressure Spindles
Although installing the gate frame is essential, securing it firmly with the pressure spindles guarantees stability and safety.
To properly adjust the pressure spindles, follow these steps carefully:
- Position the gate frame in the opening, then twist each pressure spindle clockwise to extend until they press firmly against the walls.
- Tighten the spindles evenly on both top and bottom to avoid tilting or gaps larger than three inches.
- Regularly inspect the spindles—at least monthly—to verify they remain snug and retighten if the gate feels wobbly.
The dual-lock mechanism featured on many modern baby gates further enhances child safety by requiring simultaneous press-and-slide action before the gate can be opened, helping prevent accidental access.
Taking these actions helps you serve your family’s safety needs by preventing accidents.
Remember, a securely installed baby gate offers peace of mind and protects those you care for most.
Confirming Lock Engagement
To secure your baby gate properly, make certain the pressure lock mechanism is fully engaged by tightening both the top and bottom spindles firmly against the wall.
Apply even pressure to all four spindles—two at the top and two at the bottom—to achieve a balanced and secure fit. For added confidence, consider gates with double safety lock features as highlighted in recent product reviews for enhanced security.
After you install the gate, visually inspect any pressure lock indicators; a green signal confirms a secure fit.
Regularly check the lock engagement, especially after the first few uses, to guarantee the gate remains stable.
If the mechanism isn’t fully engaged or the gate feels loose, re-adjust and retighten the spindles.
Taking these steps guarantees the pressure lock mechanism maintains a secure fit, keeping your baby gate safely installed and effective at preventing accidents on stairs.
Checking Gate Stability and Safety Compliance
When installing a pressure-mounted baby gate, you should guarantee it complies with the European Safety Standard EN1930:2011, which guarantees the gate meets current safety requirements. Ensuring the gate’s stability and safety compliance protects the little ones in your care. Follow these essential steps:
- Test the gate by pushing and pulling to detect wobbling; tighten or replace screws as needed.
- Confirm the gap between the floor and gate base is no more than three inches to prevent accidents.
- Use wall cups and spacers for a snug fit against walls or frames, eliminating gaps that compromise stability.
Regular monthly inspections help you maintain the gate’s secure installation, providing peace of mind that safety is never compromised.
Tips for Maintaining Your Pressure Mounted Gate
Maintain your pressure mounted gate by inspecting it monthly for wear, loose fixings, or damage that could affect safety. Regularly inspect your pressure mounted gate to maintain the gate's stability and guarantee it functions properly. Tighten loose fixings and check the pressure mechanism to prevent accidental openings. Use spacers if skirting boards are present to keep the gate secure and at the correct height. Also, verify the gap between the floor and gate base is no more than three inches to stop children slipping underneath.
| Task | Action |
|---|---|
| Inspect wear | Look for cracks or damage |
| Check fixings | Tighten any loose spindles or screws |
| Verify pressure mechanism | Confirm it securely holds the gate |
| Measure floor gap | Guarantee gap ≤ 3 inches |
| Use spacers if needed | Install for skirting board installations |
Common Installation Challenges and How to Overcome Them
Regular inspections help catch minor issues before they become installation problems, but you might still face challenges while setting up your baby gate.
Regular checks catch small problems early, ensuring your baby gate stays secure and safe after installation.
To guarantee your gates are secure and safe, watch for these common hurdles:
- Measuring the Opening: Accurately measure between walls to fit your gate; basic models suit 26–38 inches, but wider spaces need special gates.
- Wall Cup Placement: Mark the wall precisely before attaching hardware onto it. Misplaced cups reduce pressure and stability.
- Unsteady Gate: Tighten all spindles so the frame sits flush against the wall. Use longer screws or spacers for skirting boards and rounded banisters to maintain alignment.
When to Replace Your Pressure Mounted Stair Gate
You should replace your pressure mounted stair gate immediately if you notice any cracks, breaks, or signs of damage that could jeopardize its safety.
Regularly inspect pressure-mounted gates at least once a month, tightening any loose fittings to maintain security.
If the gap between the floor and the gate base exceeds three inches, it’s time to replace the gate to prevent accidents.
Also, consider replacing the gate when your child can climb over or open it independently, typically around ages two to three.
Finally, verify your gate meets current safety standards; replace older models that don’t comply with European Safety Standard EN1930:2011.
Staying proactive about these factors helps you serve your family by prioritizing safety and preventing potential hazards.
Ensuring Child Safety Beyond Gate Installation
Although installing a baby gate greatly reduces stair-related risks, it’s essential to stay vigilant and supervise your child closely around stairways. Installing the gate is just one step in guaranteeing child safety. To protect your little one effectively, remember to:
Installing a baby gate reduces risks, but vigilant supervision remains crucial to ensure your child's safety around stairs.
- Regularly inspect the gate at least once a month, tightening loose fixings and checking for damage that could compromise safety.
- Confirm the gap between the floor and gate base is under three inches to prevent slipping hazards.
- Educate your child about the gate’s purpose and discourage climbing or tampering.
Additionally, choosing a gate made of durable nylon fiber with reinforced safety features ensures long-lasting protection and minimizes potential injury from impact.
Always remember, supervision complements the gate’s protection—it doesn’t replace it. By combining proper installation with ongoing vigilance, you create a safer environment your child deserves.
Frequently Asked Questions
Are Pressure Mounted Baby Gates Safe for the Top of Stairs?
You shouldn’t use pressure-mounted baby gates at the top of stairs due to safety concerns like instability. Installation tips recommend screw-fit gates because their design features guarantee secure attachment and reduce fall risks, keeping your little one safer.
How to Put up a Pressure Mounted Baby Gate?
Don’t put the cart before the horse—start by measuring your doorframe. Follow installation tips carefully, address safety concerns by ensuring firm pressure, and choose product recommendations known for stability to protect loved ones effectively.
What Is the Alternative to Pressure Mounted Baby Gates?
You can choose hardware options as an alternative, offering enhanced safety features for stairs. Follow installation tips carefully to secure these gates firmly, minimizing risks and ensuring reliable protection for the little ones you’re serving.
What Is the Difference Between Screw Fit and Pressure Fit Baby Gates?
Think of screw fit gates as steadfast guardians, meeting safety standards with secure installation tips and sturdy gate materials. Pressure fit gates offer gentle support but require caution to maintain safety and frequent adjustments over time.
Final Thoughts
Installing a pressure mounted baby gate for stairs is like putting together a sturdy puzzle—each step matters to keep your child safe. By measuring carefully, choosing the right gate, and following installation tips, you’ll create a reliable barrier without damaging your walls. Remember to check the gate regularly and replace it when worn. Staying attentive guarantees your little one stays protected, giving you peace of mind every time they approach the stairs.
If you want to know other articles similar to How to Install a Pressure Mounted Baby Gate for Stairs you can visit the Baby Gates & Safety Systems category.
Best Baby Safety Gates for Pets and Babies

10 Baby Proofing Tips for Open Floor Plans
What Are the Most Stylish Baby Gates?

3 Best Wooden Baby Gates With Walk-Through Doors

10 Best Baby Gates for Outdoor Decks

What Baby Gates Work for Irregular Shaped Spaces?

Best Extra Long Baby Gates for Playrooms

Best Extra Tall Baby Gates for Toddlers

Why Choose a Baby Gate With Cat Door?
This is also interesting